
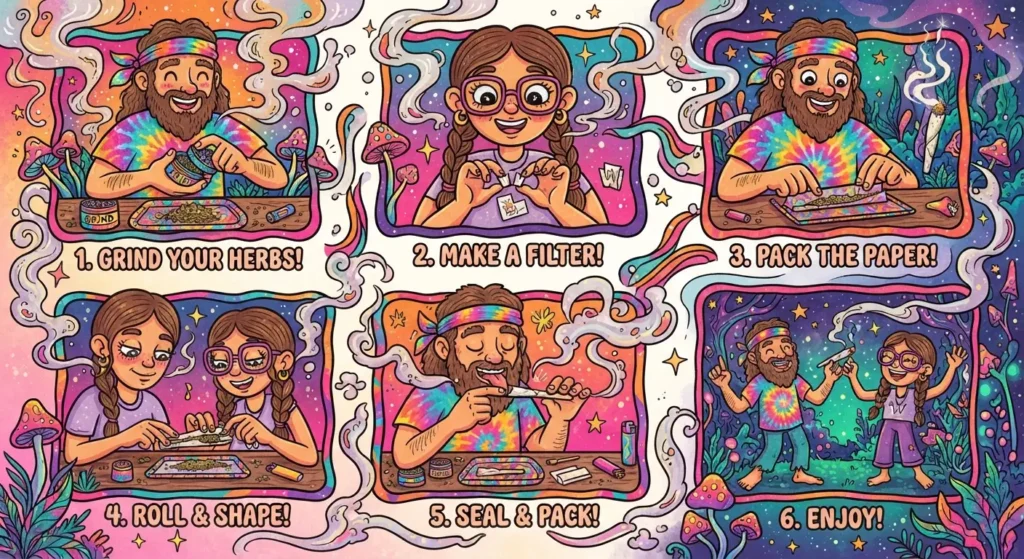
There is a distinct romance to rolling your own cannabis. While pre-rolled cones and high-tech vaporizers have their place, there is something deeply satisfying about taking raw flower and crafting a perfect, slow-burning joint with your own hands. It’s a ritual, a skill, and for many, a rite of passage.
However, if you are new to the craft, staring at a flimsy piece of rolling paper and a pile of ground herb can feel intimidating. A poorly rolled joint can ruin a premium strain, leading to canoeing (uneven burning), harsh hits, or a loose draw that constantly goes out.
Whether you are a complete beginner looking to master the basics or an occasional roller trying to refine your technique, this comprehensive guide will teach you how to roll a joint like a seasoned pro. We will break down the essential gear, the precise step-by-step mechanics, and the expert tricks needed to achieve the perfect, even burn every single time.
What You’ll Need Before You Start
You don’t need much, but having the right tools makes all the difference. Here’s what to gather:
- Cannabis flower: About 0.5 to 1 gram is perfect for a standard joint . Start with less if you’re new—it’s easier to handle.
- A grinder: This is non-negotiable for a good roll. A quality grinder breaks your flower down to a consistent, fluffy texture .
- Rolling papers: Grab a pack of standard 1¼ size papers. Hemp or rice papers are great for beginners because they’re forgiving .
- A filter tip (crutch): Optional but highly recommended. It gives your joint structure and stops bits from hitting your mouth .
- A rolling tray: Not essential, but it keeps your space clean and saves the loose bits .
- A poker tool: A pen, pencil, or a dedicated poker helps pack the joint for an even burn
🔥REFER A FRIEND
THEY GET 10% OFF THEIR FIRST ORDER🔥
The Essential Gear: Setting Up for Success
Before you even touch your cannabis, you need the right tools. Trying to roll without proper equipment is the number one reason beginners end up frustrated.
Choosing the Right Rolling Paper
The paper dictates the burn rate and the flavor of your smoke.
- Rice Papers: Ultra-thin, slow-burning, and virtually tasteless. They are fantastic for preserving the natural terpene profile of your flower.
- Hemp Papers: Slightly thicker than rice, offering a more robust burn and an earthy, organic feel. They are unbleached and highly popular among purists.
- Wood Pulp Papers: The standard, cheap white papers (like classic Top White). They burn fast and can impart a papery taste. Pro tip: Avoid these if you are smoking high-quality, craft cannabis.
The Filter (The “Crutch”)
Never skip the filter. Often called a “crutch” or “tip,” this small piece of folded cardstock at the mouthpiece serves three vital purposes: it prevents loose plant matter from entering your mouth, it provides structural integrity so the joint doesn’t collapse when you pinch it, and it acts as a heat shield for your lips.
The Right Grind
Consistency is king. If your herb is too finely ground, it will pull through the filter and clog the joint. If it’s too chunky, the burn will be uneven and harsh. Invest in a high-quality, two- or three-piece metal grinder to achieve a medium-fine, fluffy consistency that packs perfectly.
Step-by-Step Guide to Rolling the Perfect Joint
Now that your station is prepped, it is time to roll. Follow these steps methodically, and you will elevate your rolling game instantly.
Step 1: Craft Your Filter (Crutch)
Take a small strip of thick, uncoated cardstock (the thick paper often found inside rolling paper packs works perfectly). Fold one end over a few times to create a solid, closed “wall.” This wall will go into your mouth and prevent plant material from slipping through. Continue accordion-folding the rest of the strip until you have a cylindrical filter about half an inch long. It should be snug, but not so tight that it restricts airflow.
Step 2: Grind and Prepare the Herb
Grind your cannabis to a medium consistency. You will need roughly 0.5 to 1 gram of flower for a standard-sized joint. If you are using a smaller “dogwalker” paper, aim for 0.3 to 0.5 grams. Avoid packing the herb too tightly into the paper at this stage; you want it loose enough to distribute evenly.
Step 3: Shape the Paper and Insert the Filter
Place the rolling paper on a flat, clean surface with the gum strip (the sticky adhesive line) facing up and pointing away from you. Hold the paper by the non-gummed edges. Place your filter on the left or right side (depending on if you are left or right-handed), leaving just enough room at the edge so it doesn’t slip out. Gently sprinkle your ground cannabis into the paper, creating an even, horizontal line. Leave a little empty space at the top (the gum strip side) to make sealing easier.
🔥 Stack your savings. Elevate your session. 10% off $100, up to 25% off $450.
🔥 Roll into the menu and start saving. CLICK HERE!
Step 4: The “Tuck and Roll” Technique
This is the most critical physical movement in joint rolling.
- Bring the two edges of the paper together between your thumbs and index fingers.
- Gently roll the paper back and forth to shape the herb inside into a tight, even cylinder.
- Once the herb is shaped, lick the gum strip lightly. Do not soak it; a quick pass of the tongue is enough.
- Starting from the side opposite your filter, use your thumbs to push the paper down and over the herb, tucking the edge tightly against the filter.
- Roll the paper downward smoothly until the gum strip meets the body of the joint. Press it gently to seal.
Step 5: Pack It Down (The “Tap”)
Your joint is sealed, but it is likely too loose. An unpacked joint will burn like a rocket and taste harsh. Hold the joint vertically with the open, untwisted end facing up. Gently tap the filtered end against a hard surface (like a table or your knuckle) a few times. You will see the herb settle down. Add a tiny pinch more herb to the top if there is a large gap, and tap again. The goal is a firm, even pack that still allows air to flow when you do a “test pull” before lighting.
Step 6: Twist the Tip
Once the joint is tightly packed, take the empty, open end of the paper and twist it tightly to close it off. This “twist” acts as a cap, keeping the herb fresh if you don’t finish it in one sitting, and it ensures the joint burns evenly from the very tip. Note: Some purists prefer to leave it untwisted and just lick the very tip to seal it, but twisting is the most beginner-friendly method to prevent unraveling.
Pro Tips for a Perfect, Even Burn
Even with perfect technique, environmental factors and minor mistakes can cause issues. Here is how to troubleshoot and perfect your burn.
Avoiding the “Canoe”
A “canoe” happens when one side of the joint burns faster than the other, creating a trench. To fix this, you do not need to relight it immediately. Instead, gently pinch the side that is burning slower (the unburnt paper) to restrict its airflow. The side that is already burning will naturally draw more oxygen and catch up to the other side.
The Importance of the “Cure”
If your joint is burning too fast or harshly, it might be “fresh.” Newly rolled joints often benefit from a quick cure. After rolling, let the joint sit in a dark, airtight glass jar for 12 to 24 hours. This allows the moisture from the herb to evenly distribute throughout the paper, resulting in a significantly smoother, slower, and more even burn.
Mastering the “Dogwalker” vs. The “Boat”
Don’t feel pressured to roll a massive, thick joint every time. A “dogwalker” (a thin, small joint using a 1 1/4 or smaller paper) is perfect for a quick, solo session and is much easier for beginners to roll tightly. Save the “boat” (a thick, king-sized joint) for when you are sharing with a group and have mastered the tuck-and-roll.
Alternative Methods for Beginners
If the traditional hand-rolling method is still feeling too complex, there is no shame in using tools to help you along.
Using a Rolling Machine
A cheap, manual rolling machine is a fantastic investment. You place the paper and herb inside the machine’s tray, roll the belts forward to shape the herb, lick the gum strip, and roll the belts backward to tuck and seal the paper. It takes the guesswork out of the “tuck” and guarantees a perfectly cylindrical joint every time.
Pre-Rolled Cones
If you want the experience of packing your own joint without the struggle of rolling the paper, pre-rolled hemp cones are the ultimate shortcut. You simply grind your herb, use a small stick to pack it into the cone, and twist the top. They are pre-shaped, pre-filtered, and guarantee a flawless, slow burn.
🔥REFER A FRIEND
THEY GET 10% OFF THEIR FIRST ORDER🔥
Beyond the Basics: Techniques to Try
Once you’ve mastered the standard roll, you can experiment with different styles.
The Cone Joint
Cones are great for a smoother, cooler smoke. They’re wider at the tip and taper down to the filter. To roll one, simply distribute more flower toward the open end before you roll .
The Backroll (Inside-Out Joint)
This is a pro move. You roll the joint with the adhesive strip facing outward. Once it’s sealed, you carefully burn off the excess paper on the outside .
The result is a joint wrapped in only one layer of paper, which means a cleaner, more flavourful smoke . It’s a bit fiddly, but worth trying.
Rolling Without a Filter
If you’re out of tips, you can roll without one. Just leave a bit of extra paper at the mouthpiece end, fold it into a small pleat, and twist it closed after sealing . It’s not as smooth as using a crutch, but it works in a pinch.
Common Mistakes and How to Avoid Them
- Overpacking: A tight joint won’t draw properly. Aim for firm but flexible .
- Underpacking: A loose joint burns too fast and unevenly.
- Uneven Grind: Mixed chunky and powdery flower causes canoeing .
- Soggy Seal: Over-licking the paper weakens it and leads to tears .
- Canoeing: This uneven burn happens when the joint is packed unevenly or lit poorly. Toast the tip evenly and rotate while lighting .
Conclusion
Rolling a joint is a tactile skill that improves with practice. Your first few attempts might look a bit like a squished caterpillar, but do not get discouraged. The secret to rolling like a pro is not magic; it is simply understanding the mechanics of the paper, the importance of a good grind, and the muscle memory of the tuck-and-roll.
Take your time, use high-quality unbleached papers, never skip the crutch, and always pack your joint firmly. Before long, you will be effortlessly crafting tight, slow-burning, perfectly shaped joints that do justice to the premium cannabis you are smoking. Embrace the ritual, enjoy the process, and happy rolling.
🔥 Stack your savings. Elevate your session. 10% off $100, up to 25% off $450.
🔥 Roll into the menu and start saving. CLICK HERE!
Frequently Asked Questions (FAQs)
To ensure you have all the knowledge you need, here are direct, expert answers to the most common questions about rolling cannabis.
How much weed do I need to roll a standard joint?
For a standard-sized joint using a 1 1/4 size rolling paper, you will need approximately 0.7 to 1 gram of cannabis. If you are using a smaller “1 1/4” or “Single Wide” paper for a personal joint (often called a dogwalker), 0.3 to 0.5 grams is the sweet spot. For a large, King-sized paper meant for sharing, you will need 1.5 to 2 grams.
Can I roll a joint using a receipt or magazine paper?
Absolutely not. Receipts are coated in BPA (a toxic chemical) and thermal paper, which releases harmful fumes when burned. Magazine pages are printed with toxic inks and glossy clay coatings. Inhaling these chemicals is highly dangerous to your lungs. Always use purpose-made, unbleached rolling papers designed specifically for combustion.
Why does my joint keep going out?
A joint that constantly goes out is usually rolled too loosely, meaning there is too much air passing through the herb, cooling the ember. It can also happen if the cannabis is too dry, or if the joint is “canoeing” (burning unevenly). To fix this, ensure you pack the herb tightly during the “tapping” phase, and gently pinch the unburnt side of the paper if it starts to burn unevenly.
What is the difference between a crutch and a roach?
Though often used interchangeably by beginners, they are two different things. A crutch (or tip/filter) is the piece of folded cardstock you intentionally place at the mouthpiece before rolling to provide structure and filter out plant matter. A roach is the small, leftover end of a joint that has been smoked down to the filter. You roll a joint with a crutch, and you are left with a roach.
How do I roll a joint without a filter or crutch?
While using a filter is highly recommended for structure and to keep herb out of your mouth, you can roll without one. The process is identical, but you must be extremely careful when packing the herb. You will need to pack the mouthpiece end much tighter than the rest of the joint to create a natural “plug” that prevents loose flower from entering your mouth. However, be warned: without a crutch, the joint is much more fragile and prone to collapsing when you pinch it.